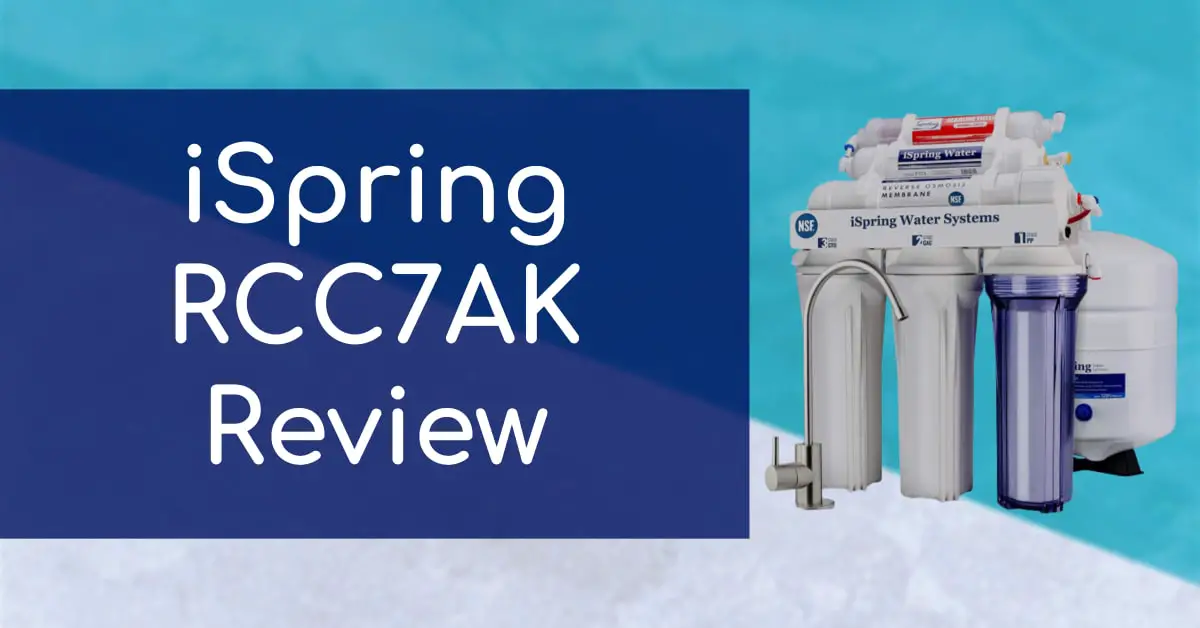
The quality and efficiency of a reverse osmosis (RO) water filtration system is largely dependent on the condition of its RO membrane.
If the membrane becomes damaged or worn out, it can reduce the system’s ability to remove contaminants from the water, leading to a diminished water quality. It’s important to be able to identify signs of a failing RO membrane so that you can get it repaired or replaced quickly.
In this blog post, we’ll dive into the various symptoms that can help you to answer the most commonly asked question, how to tell if RO membrane is bad?, Including a decrease in water flow, low water pressure, poor taste and odor, cloudy water, and even leaks.
We’ll also discuss the underlying causes of these issues and provide suggestions on how to troubleshoot them. Moreover, we’ll touch upon the importance of regular maintenance of your RO system to prolong its lifespan and ensure its optimal performance.
1. Check Pressure Gauge for Low Readings
One way to determine if an RO membrane is faulty is to check the pressure gauge for low readings. The pressure gauge is responsible for indicating the amount of pressure being applied by the feed water on the membrane.
A low pressure reading on the gauge may be a sign of a failing membrane, as it indicates that the membranes are not performing their filtration function effectively. To check the pressure gauge, locate it on the system and check the reading.
Normal operating pressure readings vary depending on the system, but they typically range from 40 to 60 psi. If the reading falls below this range, it may be an indicator of a defective RO membrane.
It is important to regularly check the pressure gauges to ensure that the system is working at optimal performance and to prevent any further damage to the membrane.
2. Test Output Water for High TDS
If you suspect that your RO membrane may be bad, one of the first steps is to check the output water for high TDS levels. TDS stands for total dissolved solids and refers to the collective measurement of all inorganic and organic substances present in water.
Too high levels of TDS could indicate that the RO membrane is not removing impurities effectively. To test for TDS, use a TDS meter, which is a small handheld device that measures the conductivity of water to determine TDS levels.
Simply turn on the meter, submerge it in a sample of the output water, and wait for the reading. If the TDS levels are significantly higher than the recommended level, it could indicate that the RO membrane needs to be replaced.
Remember to also consider other causes of high TDS, like faulty pre-filters or inadequate pressure, before assuming that the RO membrane is the culprit.
3. Look for Water Leaks in the System
3. Look for Water Leaks in the System
The third step for determining whether a Reverse Osmosis (RO) membrane is bad is to look for water leaks in the system. If there are any leaks, this could indicate that the membrane is damaged or failing. Leaks can occur at various points in the system, including the tubing connections, faucets, and storage tank.
Check for any visible signs of water, such as wet spots, pooling, or moisture around these areas.
Additionally, listen for any hissing sounds or spraying noises, as this could also indicate a leak.
If you do find a water leak, it’s important to address it as soon as possible to prevent further damage to the RO membrane and the overall system.
4. Check for Cloudy or Discolored Water
If you suspect that your RO membrane may be bad, one of the things to check for is whether your water is cloudy or discolored. A properly functioning RO membrane should produce clear and crisp water.
If you notice that your water is cloudy, tinted, or discolored, it could indicate that the membrane is compromised. This is because the RO membrane is responsible for removing impurities and contaminants from your water, and if it is not functioning correctly, these substances may not be removed effectively.
Take note of any cloudiness or discoloration and compare it with the quality of water you typically expect from your RO system. If the issue persists, it may be time to have your RO membrane checked or replaced.
5. Listen for Unusual Noises
If you are wondering how to tell if your RO membrane is bad, listening for unusual noises is a crucial step. An RO (reverse osmosis) system is designed to operate quietly, so if you hear any unusual noises, it could be a sign of a malfunction.
When the membrane is damaged or clogged, it can cause the system to produce unusual sounds, including rattling, gurgling, or grinding. These sounds indicate that there is air or water pressure building up, which can cause further damage to the system if left unchecked.
If you notice any strange noises coming from your RO system, it is advisable to turn off the system and seek professional assistance. Listening for unusual noises is just one of the ways to determine if your RO membrane is bad; ensuring that your RO system is in top condition is necessary to ensure that you continue to enjoy clean and healthy drinking water.
6. Check the Flow Restrictor for Clogs or Debris
As part of the process of troubleshooting a malfunctioning reverse osmosis (RO) system, it is important to check the flow restrictor for any clogs or debris.
The flow restrictor is a device that helps to regulate the amount of water that flows through the RO membrane, and any blockages or restrictions can cause issues with the system’s performance.
To check the flow restrictor, first turn off the water supply to the RO system and disconnect the tubing leading to the restrictor. Use a small brush or toothbrush to gently clean the restrictor and remove any accumulated debris.
Inspect the interior of the tubing for clogs as well, and clear them out as needed. Once the flow restrictor and tubing are clean and clear, reconnect them and turn the water supply back on to the RO system.
A properly functioning flow restrictor can help ensure that the system is operating at peak efficiency, and checking it regularly can help prevent problems before they occur.
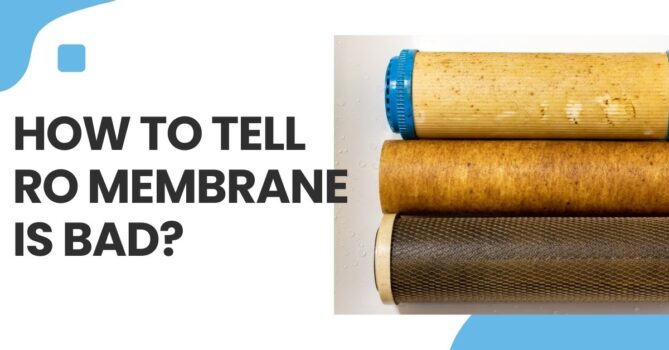
7. Inspect The Membrane for Damage or Cracks
Inspecting the RO membrane for damage or cracks is an essential step in determining whether the membrane is functioning properly. The RO membrane is a key component in the reverse osmosis process and is responsible for removing impurities and contaminants from the water supply.
Over time, the membrane can become clogged with debris or develop cracks, both of which can result in reduced filtration efficiency and decreased water quality.
To inspect the membrane, turn off the water supply to the system and remove the membrane housing. Look for any signs of damage or wear, including cracks, tears, or discoloration.
If damage is detected, the membrane should be replaced as soon as possible to prevent further contamination of the water supply.
Regular inspection and maintenance of the membrane is crucial to ensure optimal water quality and system performance.
8. Check The Pre-Filter For Accumulated Debris
Checking the pre-filter for accumulated debris is an essential step in determining whether the RO membrane is bad. The pre-filter serves as the first line of defense against sediment, dirt, silt, and other physical contaminants that can clog the RO membrane.
Over time, the pre-filter can become congested with debris, reducing its effectiveness and putting extra strain on the RO membrane.
To check the pre-filter, turn off the water supply, remove the filter housing, and inspect the filter element for any signs of accumulated debris. If there is significant sediment buildup, it is likely time to replace the pre-filter to prevent damage or clogging of the RO membrane.
It is recommended to check the pre-filter on a regular basis to ensure optimum performance and longevity of the RO membrane.
9. Inspect the Post-Filter for Accumulated Debris
When inspecting a Reverse Osmosis (RO) membrane, it is essential to check the post-filter for accumulated debris. This filter is situated after the RO membrane and is responsible for removing any impurities that may have passed through.
Any accumulated debris on the post-filter may indicate that the RO membrane has malfunctioned or failed altogether.
To inspect the post-filter, remove it from the membrane housing and examine it carefully for any visible buildup of sediment or other particles. If there is excessive debris present, it could be a sign of a failing RO membrane, and immediate action should be taken to replace it before further damage occurs.
Regular inspection of the post-filter and replacing it on time can prolong the life of your RO system and ensure the purity of your water supply.
10. Check the O-ring for Damage or Leaks
When it comes to maintaining your RO (reverse osmosis) system, it’s essential to periodically check the condition of the RO membrane. One of the critical steps to ensure that the membrane is functioning correctly is to check the O-ring for damage or leaks.
The O-ring is responsible for creating a secure seal on the RO membrane housing, preventing water and contaminants from leaking out. A damaged or deteriorating O-ring can lead to a significant drop in the RO system’s efficiency, rendering it ineffective in removing impurities from the water.
It’s important to inspect the O-ring regularly and replace it if any deformities are detectable, such as cracking, flattening, or visible gaps. Adequate maintenance of the O-ring will help you extend the overall life span of your RO system, improve its performance, and ensure that the water you consume is clean and safe.
In conclusion, identifying a bad RO membrane is essential to maintain the efficiency and longevity of your reverse osmosis system. By paying attention to the signs mentioned in this post such as low water pressure, bad odor or taste, and reduced water production, you can easily detect if there is an issue with your RO membrane.
Regular maintenance and replacement of the RO membrane according to the manufacturer’s recommendations can help prevent these issues and ensure the consistent delivery of clean and safe drinking water.